Update Sets
Update Sets in ServiceNow are the platform’s built‑in mechanism for capturing configuration changes—things like new fields, business rules, UI policies, script includes, or other customizations—so they can be moved safely from one instance to another. Think of an Update Set as a container that records metadata about changes you make in a development instance. This allows teams to build features in a controlled environment and then promote those changes into testing or production without manually recreating work. For developers new to ServiceNow, it’s important to understand that Update Sets track configurations, not data, and they only capture changes made through the application’s update‑able tables.
In a typical development workflow, each developer creates or selects an active Update Set before making platform changes. Once the work is complete, the Update Set is marked “Complete,” exported as an XML file (or moved via the Update Set repository), and then imported into another instance where it can be previewed and committed. Previewing helps identify conflicts or missing dependencies that could cause issues. While Update Sets are essential for configuration transport, they also come with limitations—such as not capturing certain record types or data—and many organizations eventually adopt more advanced DevOps tooling. But as a foundational concept for anyone starting with ServiceNow development, understanding how Update Sets work is critical to maintaining stability and consistency across environments.
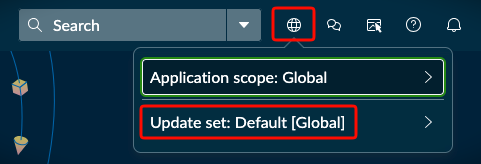
Creating an Update Set⚓︎
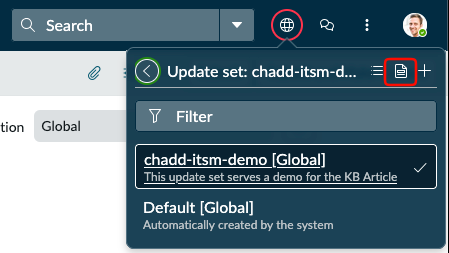
To create a new update set, you'll first need to click on the globe icon in the upper right hand area of ServiceNow. From there you'll want to click on "Update set"
Once you click on "Update set" it will bring you into the Update set menu and you can then click the + icon to create a new update set.
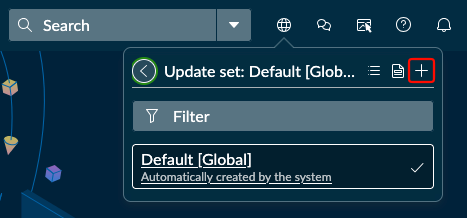
(You can also just use this link)
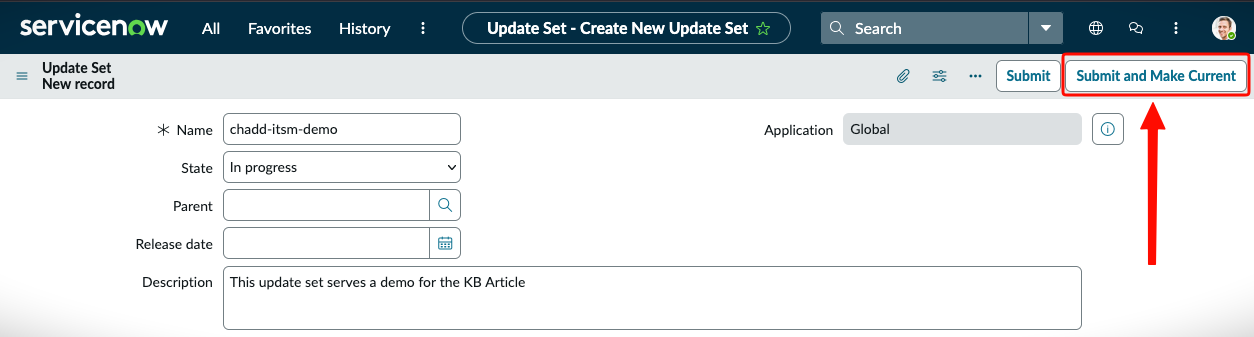
Once you are on the new page to create your update set you'll need to fill in two areas
- Name
- Description
The Name should be something quick and easy to identify you with, along with the area of the platform you're modifying (ITSM, HRSD etc). It should also contain reference to a Story or Ticket number in some form so a year from now we can understand why something was done.
The Description field should just contain a high-level summary of what this update set is about.
Info
When filling in the Name and Description, think of what you'd want to see if you were trying to understand a change made years ago by someone else. Your future self (or other developers) will thank you for taking the time to fill this out.
Once you have filled in the Name and Description, click on the Submit and Make Current button.
Viewing Your Update Set⚓︎
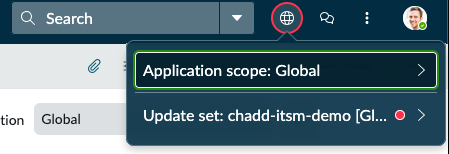
This will take you back to your home page (or wherever you were before). You won't see any obvious changes except that Globe icon we used earlier....it should not have a red circle around it. If you don't see a red circle, refresh your browser page. The red circle tells you you're in a custom update set now.
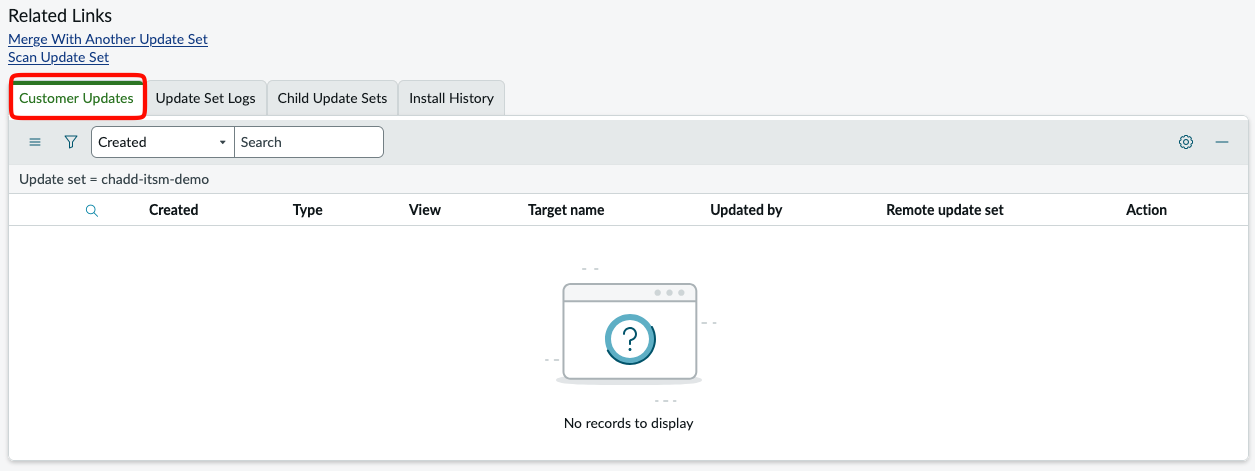
You can once again click on your Update Set, and then click on the Record item this time. This will take you directly to your update set.
Go ahead and click on it now and scroll down to the bottom where you'll see Customer Updates. You'll notice this area is now blank, but as you make your development changes, everything you do will start showing up here.
When you are all done making your change(s) you'll come back to this Update Set and change the "State" to "Complete". This will make your update set eligible for the next instance to pick up so we can migrate your changes from Dev -> Test -> Prod.
Info
Once you are finished with your Update Set it will have to go through a Code Review process before being promoted to Test.